
Where the heck are we???
It happened again. I used up all the gigabots for this blog with photos. I’m not interested in paying to upgrade the site so I just started a new Vikapproved Mk2 Blog. Same shit. Different channel.
See you there! 😉
Where the heck are we???
It happened again. I used up all the gigabots for this blog with photos. I’m not interested in paying to upgrade the site so I just started a new Vikapproved Mk2 Blog. Same shit. Different channel.
See you there! 😉

Get up on it!
Overview
I’ve just wrapped up my 3rd season of bikepacking on Surly’s 29+ Krampus so I thought it was time to jot down my thoughts. I’ve used the Krampus mostly for lightweight mountain bike touring. The Krampus replaced a light hardtail 29er bikepacking bike with classic XC geometry. My riding has been split between Vancouver Island, Chilcotins and CDN GDR route. That encompasses a wide variety of conditions from technical gnar-fest to high-speed logging road cranking.

Walking the Krampus…
Frame
Like all Surly frames the Krampus is made from 4130 chromoly. It’s got a custom butted set of tubes. What that exactly means is impossible to know without cutting up a frame and measuring it. What I can say is that the tubing has some of that lively feel that a lighter duty bike has which I like a lot. It springs forward in a pleasant way and doesn’t feel dead like an overbuilt frame does. At least that’s true for my 180lbs on a medium frame.
I’ve crashed, dropped, dragged and thrown my Krampus around on my various trips. Although I describe the tubing as more flexible than a typical Surly touring tank don’t get the impression it’s some delicate boutique shit. It’s not. I have worn the powder coat away in a number of places and scratched the tubing, but I have not managed to dent or damage it in any significant way.

Naked and ready to be built up…
The Krampus uses standard bike parts. A 73mm BB and 100mm/135mm hubs. That’s great. You can swap parts from a 29er you have in your garage and ride the Krampus without having to rebuild wheels with Boost hubs. The fact the Krampus works just fine with 3″ tires on 100mm/135mm hubs makes the argument that Boost is needed for “plus” sized tires silly.
One feature of the Krampus frame I really dig is this cast yoke. If you look at a lot of other 29+ bikes you’ll see a bent section of flat plate on the drive side chainstay in order to make room for the chubby 3″ tire. Putting a flat plate in this area that has to resist all the pedaling forces is bad engineering. It’s done because the two other options are:
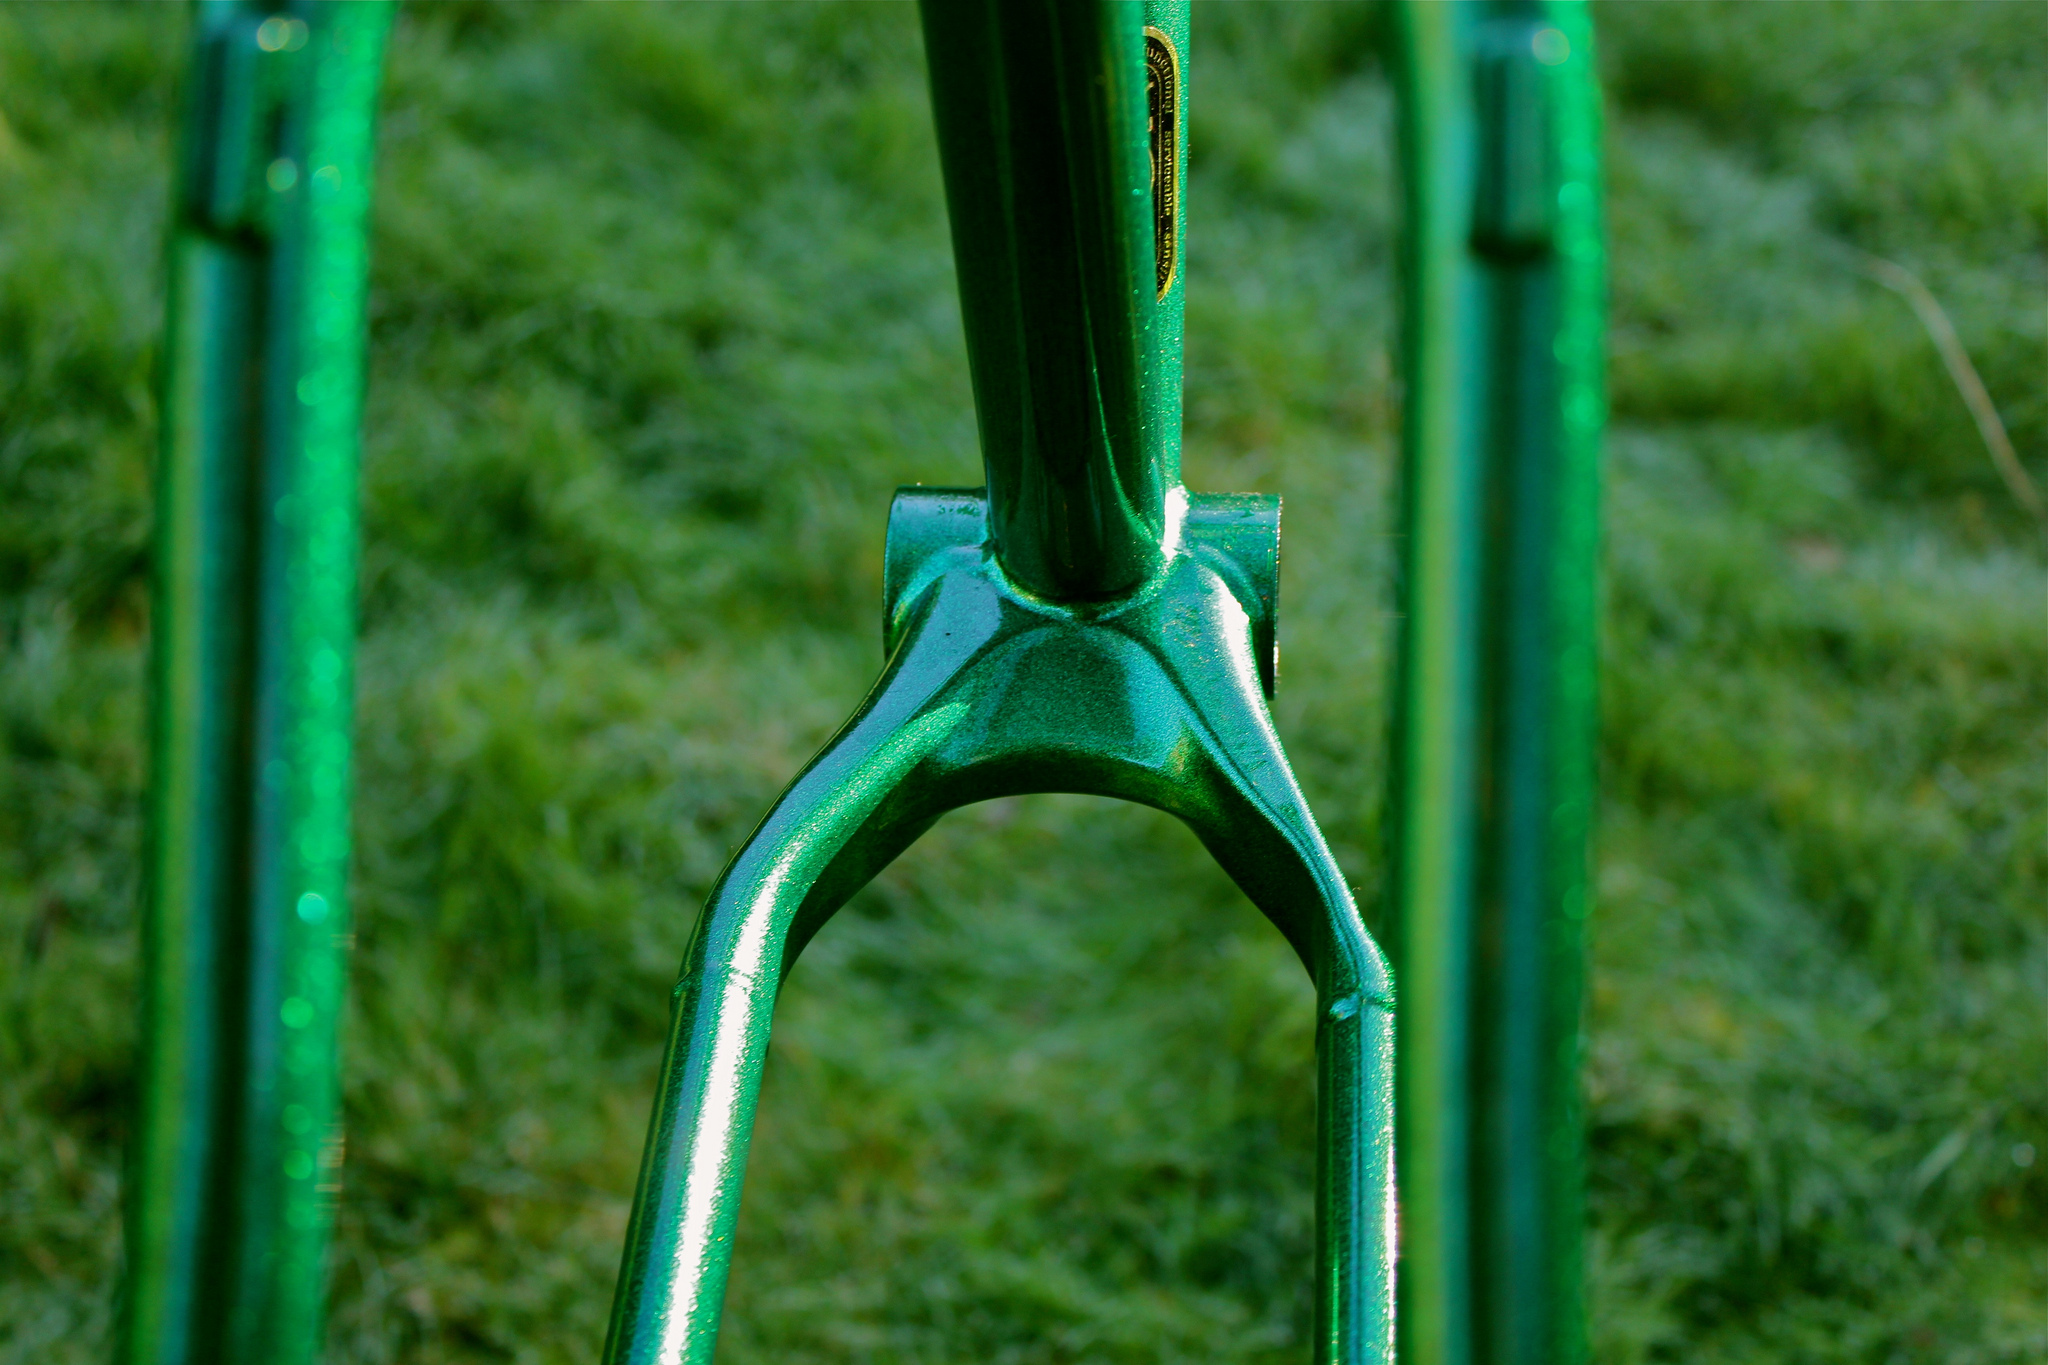
Love this yoke!
Although Surly is considered a low bling brand they do have the engineering and financial might of QBP behind them plus they sell in enough volume that they can amortize a kick ass feature like this yoke over enough frames to make it financially viable.

1 1/8″ or tapered – you choose…
The headtube on the Krampus is 44mm which allows you to use a straight 1 1/8″ fork or a tapered fork. Over the test period I used the Krampus rigid with the stock fork for 2 seasons and then with a tapered 130mm suspension fork for this past season.

Horizontal dropouts – simple and versatile…
The Krampus I have is the Bass Boat Green version with horizontal dropouts. You can now buy a Stealth Black version with MDS swappable dropouts so you can have vertical dropouts if you are running a derailleur. I read a lot of angst online about Surly’s horizontal dropouts. I’ve been using them for 8yrs now and I don’t understand what the problem is. Fixing a flat takes an extra 30 seconds which I have never noticed. You do learn to get the wheel installed more efficiently once you’ve used these dropouts so it does take a moment to master them. With a QR IGH I use 1 or 2 Tugnuts to keep the wheel in place. With bolt on hubs they are not needed. For a derailleur hub they are not needed as the axle is slammed all the way forward in the dropouts. I have ridden with folks whose bikes use EBBs, sliding/swinging dropouts and they all have their problems – such as creaking, stripped hardware and unwanted flex. The Surly horizontal dropout is a low cost, elegant, versatile solution for a bike that could be setup many ways [IGH, SS and derailleur] and it’s pretty much bombproof.

MDS = many delightful solutions…
As noted above if you can’t cope with the idea of horizontal dropouts you can simply buy the MDS version of the Krampus and then select the type of dropout you prefer. If you are exceptionally crafty you could even have a custom dropout machined for a MDS frame since it would just need to mate to the attachment points. I would not be surprised to see some aftermarket options show up in the next while.

My Knardly Surly Krampus…
So far I’ve been pretty positive about the Krampus’ frame. There are a couple things I do not love. It has a aggressively sloped top tube. These are fashionable, but having mountain biked with old school high TT’s a bunch I have never hurt “my boys” because of a high TT. The sloped TT cuts into the frame space if you want to fill it with a bikepacking framebag. The other thing I don’t love is the skinny 27.2mm seat tube. It’s fine for a rigid post, but it limits your dropper post options. Other Surly frames are coming with 30.9mm seat tubes so hopefully that’s on the way for the Krampus at the next revision.
The last thing I’ll touch on with regards to the frame is the sparkly green powder coat. It’s rad. Definitely my favourite of all the Surly finishes I’ve seen and pretty much my favourite of any production bike to date. Aside from looking sweet it’s fairly durable. I have managed to fuck it up, but I had to try fairly hard to do so.

Krampus with suspension fork…
Geometry and Handling
If you compared the Krampus’ geo to the older Surly bikes like the Karate Monkey. You’ll see it’s slacker and longer in the reach department. That’s not shocking because that’s what’s fashionable right now. The other fashionable thing at the moment is an uber low BB. The Krampus doesn’t have that and I like that a lot.

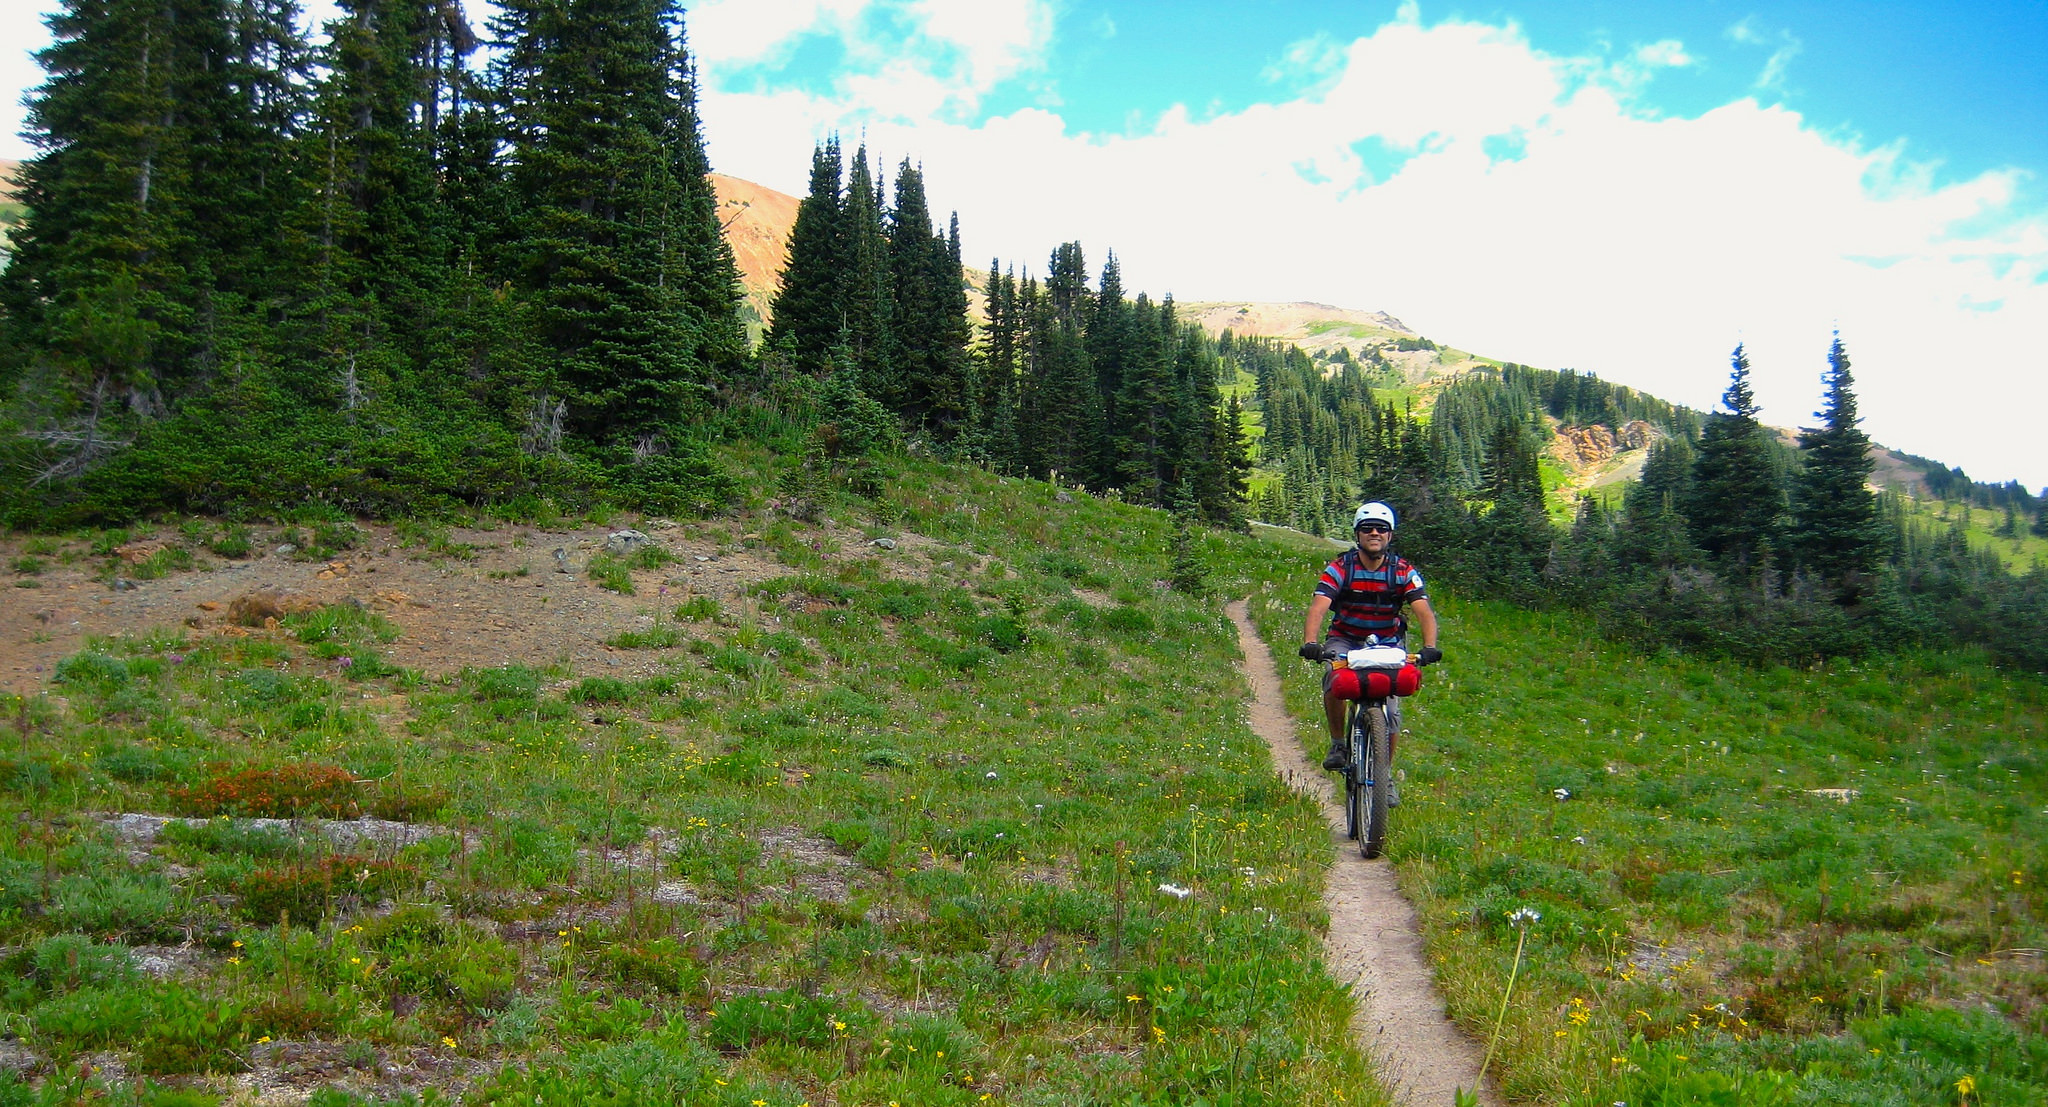
Excited to be nearing beer…
The longer reach allows you to run a short stem and wide bars if you want to or to size down one frame size while running a longer stem and narrow-ish bars. I’m doing the later and riding a medium instead of riding a large. The reasonably short 17.6″ chainstays and shorter front end make for a very manoeuvrable/playful bike. Since I live in BC with lots of trees that seemed like a better choice. For wide open trails or logging roads I’d probably pick the larger frame and run a short stem, but still stick with narrower bars. I’ve never warmed up to the uber wide bar thing.

Enjoy some moist trail riding on my Surly Krampus…
Although slacker compared to tradition MTB geo the Krampus is not a chopper at a 69.5 degree head tube angle. It’s a good compromise for riding techy steep terrain while still being able to carve up singletrack. Some folks are mounting up longer suspension forks on this frame to get a slacker geo and some squish. I tried that and concluded I preferred the more balanced feel from the stock rigid fork. Loaded up with camping gear I am only going to get a little rowdy on the Krampus. I didn’t feel like I was getting enough benefit from the 130mm Fox Float 34 compared to the extra weight which made it harder to loft the front wheel and the slacker steering which was not as sporty when things got tight.

Stock fork and geo is pretty sweet…
Getting back to that high BB it may not be fashionable, but it works great. You avoid a bunch of annoying pedal strikes and the higher bike handles slow speed tech better as it’s more stable than a lower bike. It gives you the ability to run “normal” 2.4″ 29er tires and still maintain a useful BB height. What about stability at speed with a higher center of gravity? Interestingly despite a short wheelbase on my Krampus once I get those big 3″ tires up to speed they generate a lot of stability due to the gyroscopic effect.

Good times!
The shortish chainstays keep the bike manoeuvrable and with the light front end it’s easy to get it up when tackling some tech. This is especially true when climbing where it feels like I am on the back wheel for the most part helping it dig in for epic traction and letting me pop the front wheel up and over obstacles or simply place it down on a better line.

Big tires and short-ish chainstays…
The big tall tires erase a lot of trail roughness for a smoother ride than you’d expect from a rigid bike and keep rolling like a monster truck once you get them up to speed. On rolling terrain this is not a slow bike. It loves to charge hard and seems to laugh at whatever the trail throw at you around the next corner.
This combination of slow speed tech crushing and high speed stability plus the big 29+ wheels ability to tame the trail is pretty magical. No really magical! I’ve looked at getting a bling custom 29+ frame a few times and what stops me is feeling like I’m going to spend a lot of $$ and might not get a bike that handles as well as the $575 Krampus.

Wet feet – get used to it!
Parts Spec
I built my Krampus up from a frame/fork.

Flathead Valley Area…
Stuff I tried:
There is nothing fancy about my build other than the Rohloff hub. Everything is solid and works well. For a touring bike that’s more important than bling. The Rohloff is a dependable drivetrain that offers a wide gear range that ignores weather and is very hard to damage. The trade off is a heavy rear wheel.

SLX brake caliper…
The only components I’ve been disappointed with are the SLX brakes [older 2008/09 version] when used in really challenging steep technical terrain they are not particularly powerful. I’m going to try some more aggressive pads and if necessary move up to a 203mm rotor up front. For less demanding touring they have worked fine. To be fair riding techy terrain with camping gear is not an easy job for a set of brakes. To their credit these brakes have been 100% reliable. I just want more stopping force out of them.

Surly Knard + Rabbit Hole tubeless…
29+ Tires
I’ve only tried two models of tires, but they have turned out to be excellent for the kinds of riding I do so I’m very happy.
The Surly Knards in 120tpi roll fast and grip well enough for general bikepacking duties that cover logging roads, pavement and easy trails. I’ve ridden on a fair bit of sharp rocks and only managed 3 flats over 3 seasons. All of which were easily fixed. They setup tubeless well and have been 100% reliable once setup. Their main weakness is the lack of aggressive knobs which means they wash out on steep loose sections and loose off camber sections.

Plowing through some snow with my Chupacabras…
The Chupacabras have only been used for one major trip so I won’t be able to report on their durability, but they do offer much better traction [especially on loose off camber terrain] at the cost of a bit more rolling resistance. I did not suffer any flats with Chupas, but it’s still early days. Surprisingly they were a bit harder to setup tubeless than the Knards, but once setup they were 100% reliable. The Chupas are a bit pricey so I wouldn’t want to wear them out on easier terrain where I didn’t need them.
For logging roads and easy trails I’ll grab the Knards. If things get more challenging I’ll use the Chupas.

Hombres at the Cape Scott Park start…
Bikepacking Setup
For the most part I have used Porcelain Rocket softbags on the Krampus. They carry enough stuff to get me through 1 week trips. They are rugged and stable so I can thrash the Krampus as hard as a middle aged weekend warrior dares.

Older style seat bag…
I have tried two versions of the PR seatbags. The first version is a typical frameless bag that attaches under the saddle and to the seatpost with a combination of straps with buckles and velcro. This style of bag is really easy to use on different bikes and is light and lower cost. The main downsides are that it can move a bit when really charging rough trails and it’s easier to leave on the bike at camp than pull off each night.

New Porcelain Rocket gear…
The other version of PR seatbag uses a metal frame and harness that is separate from the cargo bag. The frame stays with the bike and you can easily pull the bag off and take it to your tent. This option is much more stable for better techy riding. The downsides are high cost and it’s more effort to move between bikes. This is the bag I’m currently using on the Krampus.
Scott has an even newer version of this seatbag [I just can’t keep up!!] that is waterproof and uses an improved harness which makes taking the bag off the bike even easier.

Older PR bar bag…
I’ve used two different PR handlebar bags so far. The first used a burrito style bag with a pouch on the front that you filled with your gear and rolled the ends closed. I typically slid a dry bag inside the outer bag to keep my sleeping bag dry. Loading this bag took a bit of time, but once your stuff was inside it was well protected during the day’s ride.
The newer style of PR bar bag I’ve used is a simple harness that you use with a dry bag and then attach a pouch over top. It’s a bunch lighter, simpler and easier to use than the pervious version. The only issue with it is that your dry bag is not protected by a durable outer bag which makes it easier to damage.
For trips where durability and robustness are most important I’ll use the bar bag with an outer bag. For trips where the simplest and lightest setup is valued I’ll use the harness/dry bag version.

Custom PR frame bag…
My framebag is a pretty standard unit. One main zipper access storage area with a map pocket on the other side. Typical PR ruggedness and quality. Scott makes a zipperless roll top framebag now, but I simply don’t bikepack enough to realistically wear out a zipper and the zipper is easier to use if I want to access the contents frequently.

VikApproved and the Mighty Krampus stay hydrated…
Water
I tried mounting a water bottle to my stem with a hose clamp and really loved it. I’ve used that setup on every bikepacking trip since. It’s next to free and 100% secure. With the right bottle I find that it stays put despite super rough downhill pounding, but I have rigged a simple bit of bungee I can throw around the bottle’s nipple that prevents ejection completely. This bottle is so handy that it’s the only one I use to drink from during a ride. I then just refill this bottle from a creek or from a bigger bottle carried elsewhere on the bike as needed.
I have used fork mounted bottles in the past, but I didn’t like that setup. It affects the bike’s steering, ease of lofting the front wheel and they snag on stuff during the inevitable riding/HAB through thick vegetation. For the same reason I have zero interest in fork mount Salsa Anything Cages. If you are keen on fork mounted cargo you can attach cages to a stock Krampus fork with either electrical tape or hose clamps. Both are secure and effective. If you must use bolt mounted cages Surly sells an aftermarket Krampus fork with braze-ons for water bottle and Anything cages. The cost is ~$100.
Where I prefer to carry my extra water is below the downtube. This keeps the bike narrow and the weight low where it affect the handling least. I’ve used two hose clamps and a strap to attach a Topeak XL Modulus Cage to the Krampus and carry 1.5L of water. It’s a 100% secure and effective solution.

The heavily loaded Kram-pig!
Racks
I do my best to keep my gear load light and compact so racks are not needed. However, occasionally a trip calls for them. The Krampus is not the bike I would pick for dedicated fully overloaded touring, but if that’s something you do once in a while don’t worry the Krampus can take dual racks and panniers. I’ve only had to resort to a rear Old Man Mountain rear rack with panniers, but a front OMM rack would mount easily to this bike. You don’t need any special braze-ons to make it work.

Puddle hopping…
The Future?
Although I dig my Krampus a lot I do have some tweaks I want to make so it’s even better suited to my adventures.
This is what it’s all about…
Beyond these mods I’m just going to keep rocking the Krampus. 3yrs in and it feels as fresh and relevant as it did back in 2012. It looks like the Bass Boat Green version is history once it sells out so consider grabbing one while supplies last. Owning the first 29+ bike ever is kind of cool. 🙂
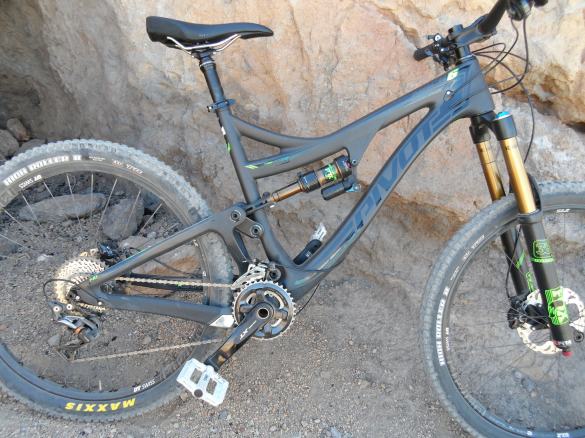
Photo: Stuck in the Spokes Blog
KRob is a MTBR.com member and owner of the Stuck in the Spokes Blog. He has posted a nice review of the Pivot Mach 6 Mk2 on his blog which you can read here.
I left him this comment on his post which I’ll repost here since it’s a good summary of my feelings about the 2014 Mach 6 Mk1 I’m riding as my main trail bike.
“Thanks for the review KRob. I bought a M6 in 2014 partially based on your review. It has been a great bike for tight techy forest riding here on Vancouver Island.
I ride my M6 for the spring and summer then switch to a SC Nomad Mk 2 for winter.
Things I love about the M6:
All the things I didn’t love seem to have been solved in the Mk2 Mach 6.
I didn’t notice the lack of stiffness Pivot has solved in the new version, but I am a middle aged enthusiast rider so I don’t push my bike as hard as a lot of folks might.
This is a great do everything bike. From long XC rides to tough DH it can do it all. Unlike some of the other AM rigs it feels more like a burly trail bike than a mini-DH bike. Since I have to climb for all my turns I appreciate getting to the top fast and efficiently.
I’ll be keeping my M6 long-term. I want to see how it does after 5yrs+. I suspect it will stand the test of time vs. whatever else comes out.”

Troy Lee Skyline Shorts…
I’ve been using Troy Lee Skyline shorts for about 3yrs now. Of the various mountain bike shorts I use they stand out as my clear favourite. They are made of a lighter stretchy fabric that allows a high degree of mobility while still maintaining a less baggy fit. Despite lost of rough use and crashes they look brand new. They are fairly light on features with just two unzippered front pockets I like a lot of maps. There is also a small rear zippered key pocket I never use.
They have adjustable waist velcro to dial the fit. Due to my lack of hips I do find these shorts slip down an inch or two during a ride and I will pull them back up a few times. I have this problem with every pair of shorts and pants I own so I’m not going to blame Troy Lee. They come down to just above my knee pads which is a good length for pedalling. You can trim an inch or so off each leg with a double hem that’s built in should you want a shorter leg, but I’ve never felt the urge to do this.

Back view…
Off the bike they look low profile so you aren’t screaming “I MOUNTAIN BIKE!” when you stop off at the grocery store on the way home from the traihead. You can get them in darker plain colours and some pretty wild options as well.
They do not come with a padded liner which I love. I hate wearing diapers and if I buy a short with a liner I cut it out and throw it away before the first ride…that’s a waste of materials and an expensive feature I don’t use. I’m really happy to have a great short option that isn’t padded.
I typically grab size 32 or 34 pants and I wear a 32 in these shorts so they fit true to size.
Retail cost is $70 USD, but they are frequently on sale and I buy them when they are $35-50 USD.
I had an issue with a different model of Troy Lee shorts. I contacted them through their website and never got any help. So I can’t say good things about TL’s warranty support. OTOH I’ve never had a problem with the Skyline model and I like them enough I’ll keep buying them despite this experience.

Matchy matchy tops…
What I like?
What don’t I like?
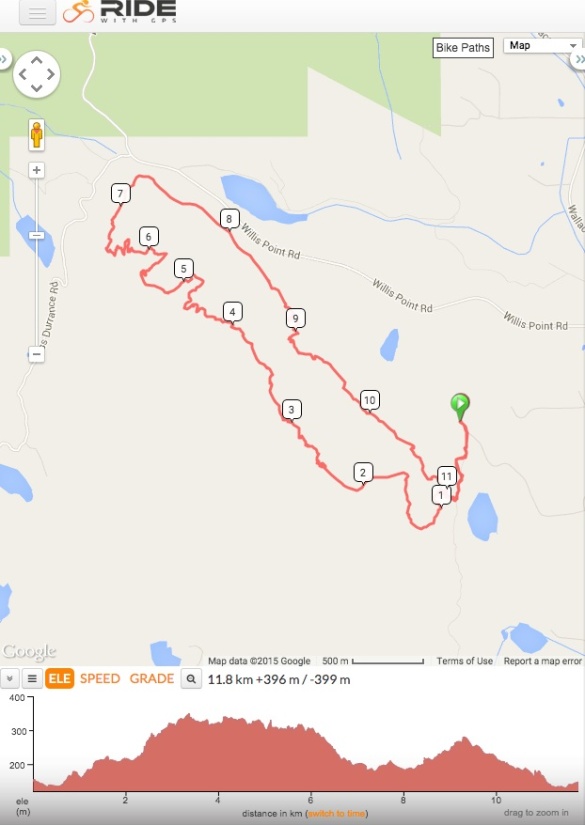
Click image for larger map and GPS track…
Looking at the map above it doesn’t look like all that impressive a ride, but it took us 5 tries to finally link up all these trails. Two of those tries ended due to injury and one of them with multiple ER visits. For a while I thought we were cursed, but yesterday we got the ride done. We started with 9 riders and finished with 4, but no serious injuries were sustained! 🙂
Trails ridden:
– Easy Rider
– Skull
– Inventive
– Little Face
– Centerfold
– Switchbacks
– Water Works
– Phase II
– Jelly Roll
– North Ridge
– Bubble Wrap
– Trillium
– Who’s Your Daddy!
– Nightshift
– Skull
– Easy Rider
This loop features a lot of sustained technical riding that is the hallmark of the Hartland Bike Park. Slower techy grinding up and steep twisty trails then steeply down with lots of rocks and roots to get through. The 12kms of riding will take between 2-3hrs depending on the group.

Joanne was happy to be part of the elite team that finally completed this ride…
The main new trail for me was Bubble Wrap which is a fun old school technical trail. Slow, steep and chunky with lots of roots and rocks to puzzle your way through. None of it is crazy hard, but it’s sustained with just a few easy sections to give you a rest. Unlike a lot of the rest of the local trails Bubble Wrap breaks out of the trees for some sunshine and spectacular views.
“A very long (for Dump standards), old school all mountain trail with minimal flow and lots of technical challenges and a few superb viewpoints. Best ridden with a new-school AM bike. Some excellent open ridge portions with sparse vegetation and lots of fun on the rocks. Riding it south to north will put you in the extreme north end of the park and far from everything else.”
By connecting it up with the rest of the trails listed above you get to ride most of the best trails in the Hartland network. I’ve got some ideas for making up a bigger figure-eight loop by heading west and south to capture the rest of the primo Hartland trails. That would be one ride to rule them all. 😉
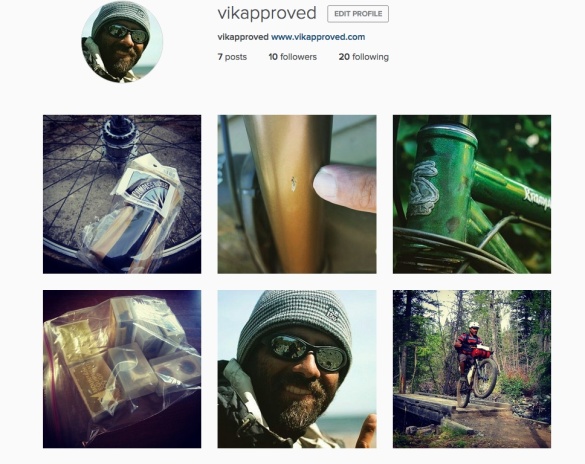
Click on image to jump to Instagram…
I’ve been too busy working and riding to blog as much as I used to. If you want a fix I‘m micro-photo-blogging on Instagram at @vikapproved . You are welcome to join me there. This blog will continue to see updates at a more or less once a week pace.
The Mach 6 got an update:
All in all a good update. Kind of doesn’t matter to me much since I’m keeping my existing Mach 6 for many more years. The stiffer linkages are retrofit-able so I can add those to my bike should I wish.

Fresh rubber…
Sharon’s Surly Cross Check has been rolling on Grand Bois Cypres 700c x 32mm tires for several years now. In that time she’s only had a few flats despite riding nearly daily to work. She’s not a powerful rider so having supple fast rolling tires is important to her. The Cypres fit the bill well.
Compass Bicycle has come up with their own version of this tire called the Stampede Pass. It’s still a supple 700c x 32mm tire. It’s similar to the Grand Bois Cypres and I believe it’s made in the same factory. I’ve been running the extra-light version of this tire tubeless on my Surly Straggler. I haven’t ridden mega miles on that bike, but my initial impressions are good.
Since Sharon rides a lot we got the normal weight version. She’ll make them “extra-light” by wearing them out!
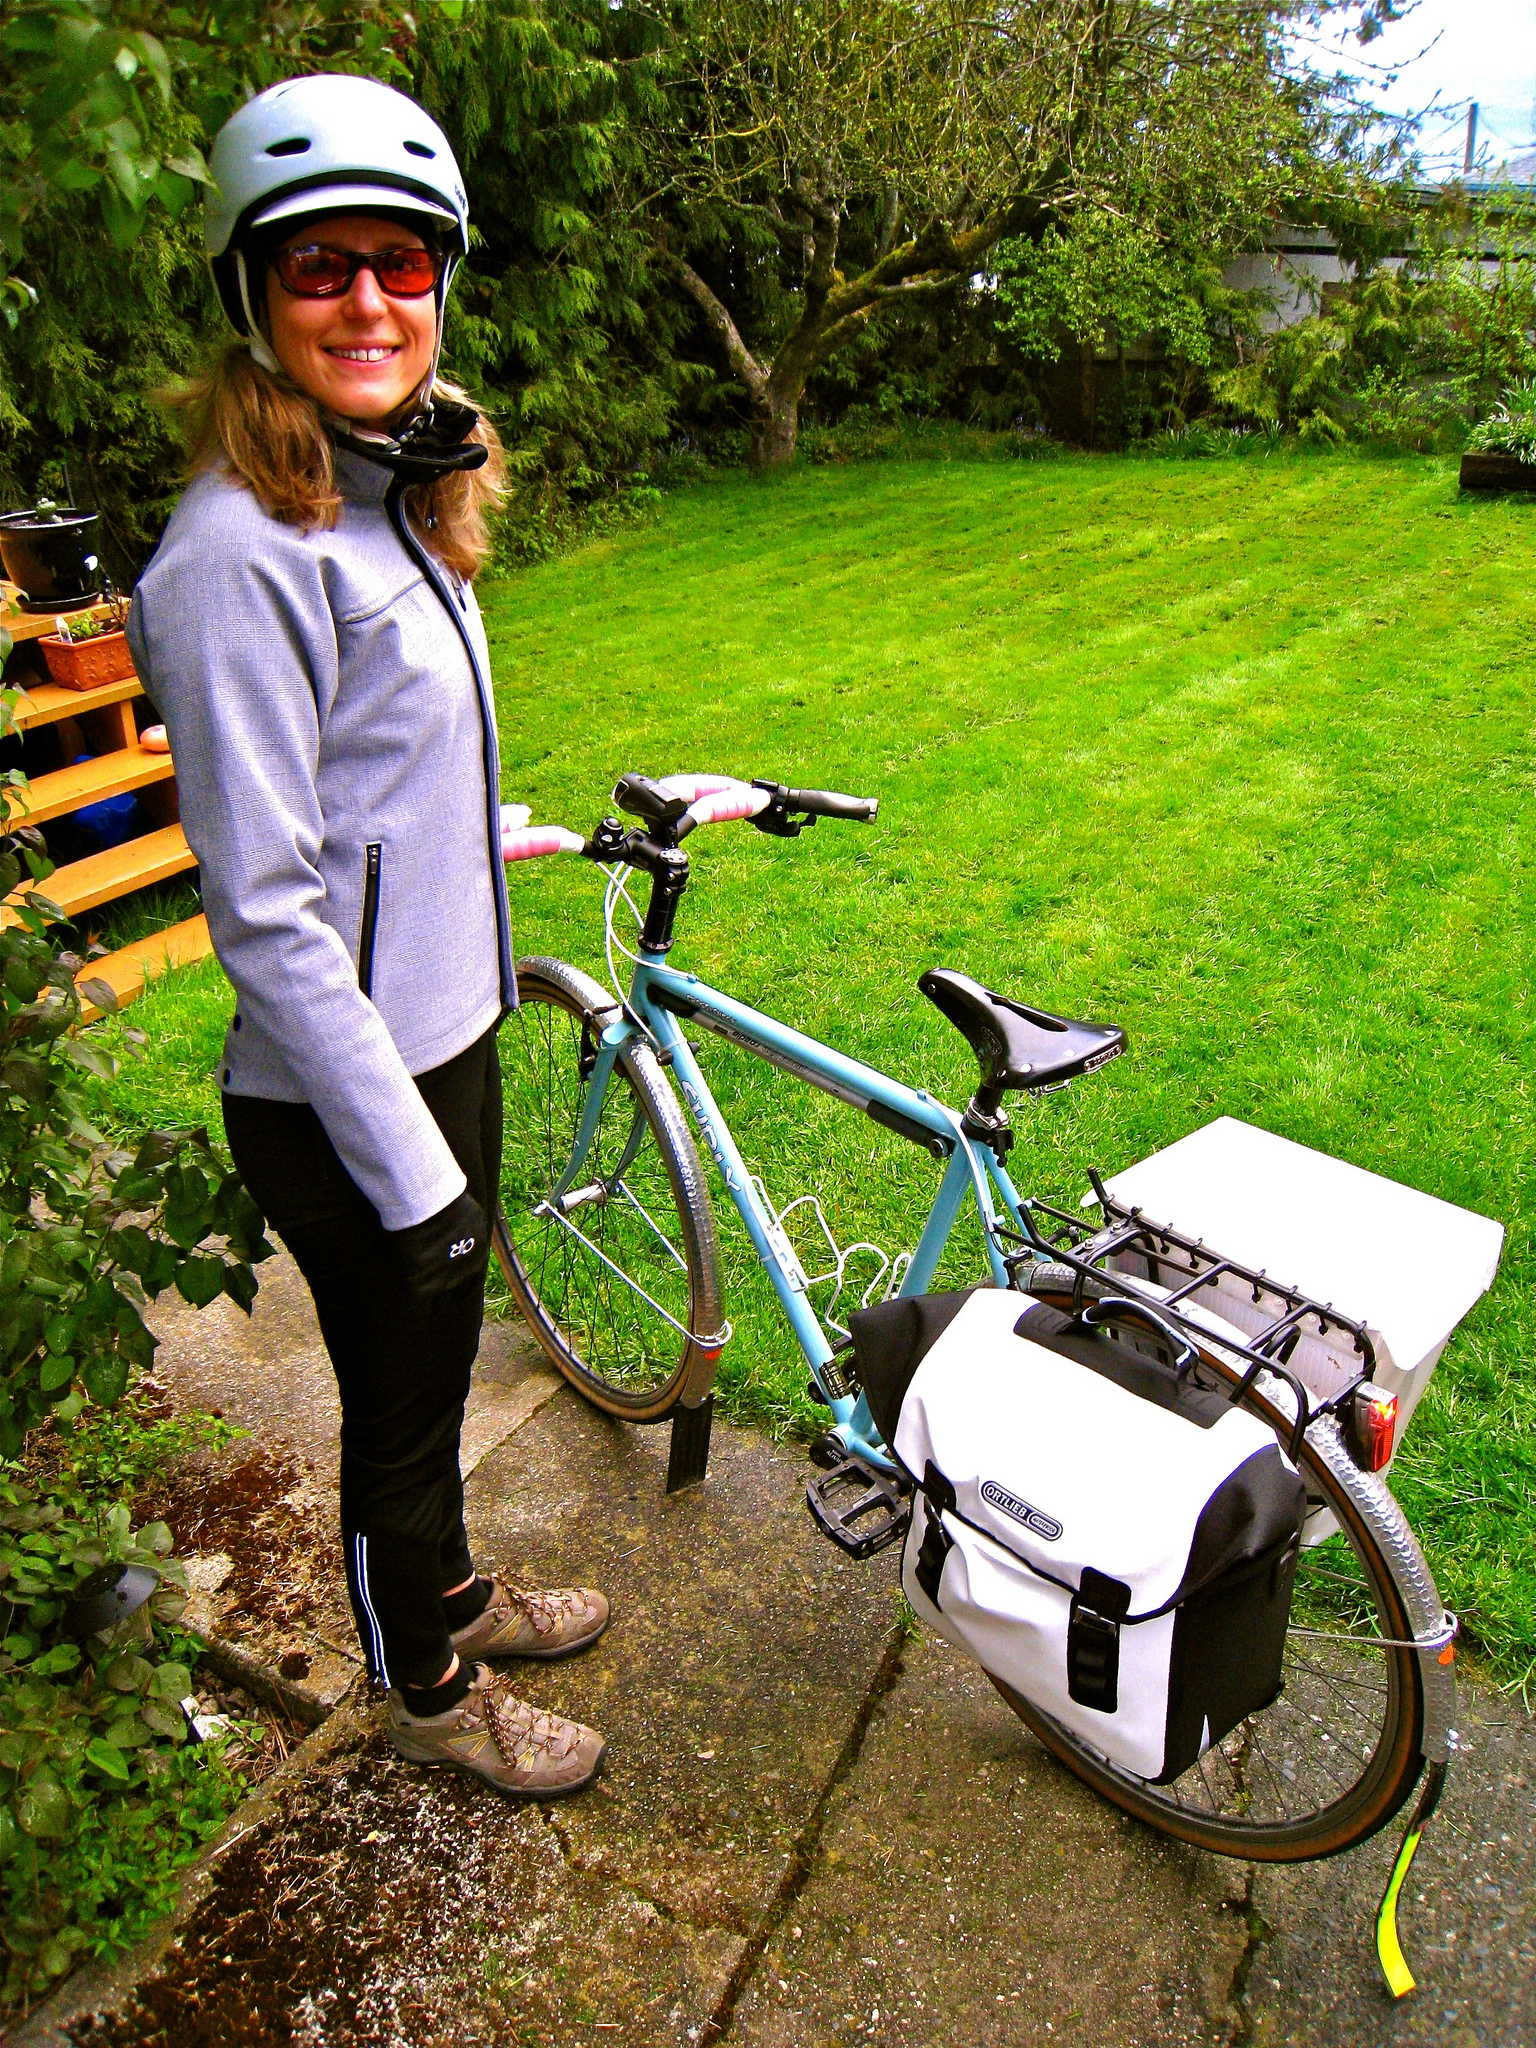
Sharon ready to roll…
We are going to upgrade Sharon’s wheels this fall as part of her birthday present. When that happens we’ll setup these tires tubeless as well. That should make her very few flats head towards zero and make these fast supple tires even faster. That’s win-win in my books. 🙂
Compass Bicycle sells these tires online for $57USD. If you live in Victoria, BC The Fairfield Bicycle Shop stocks them.
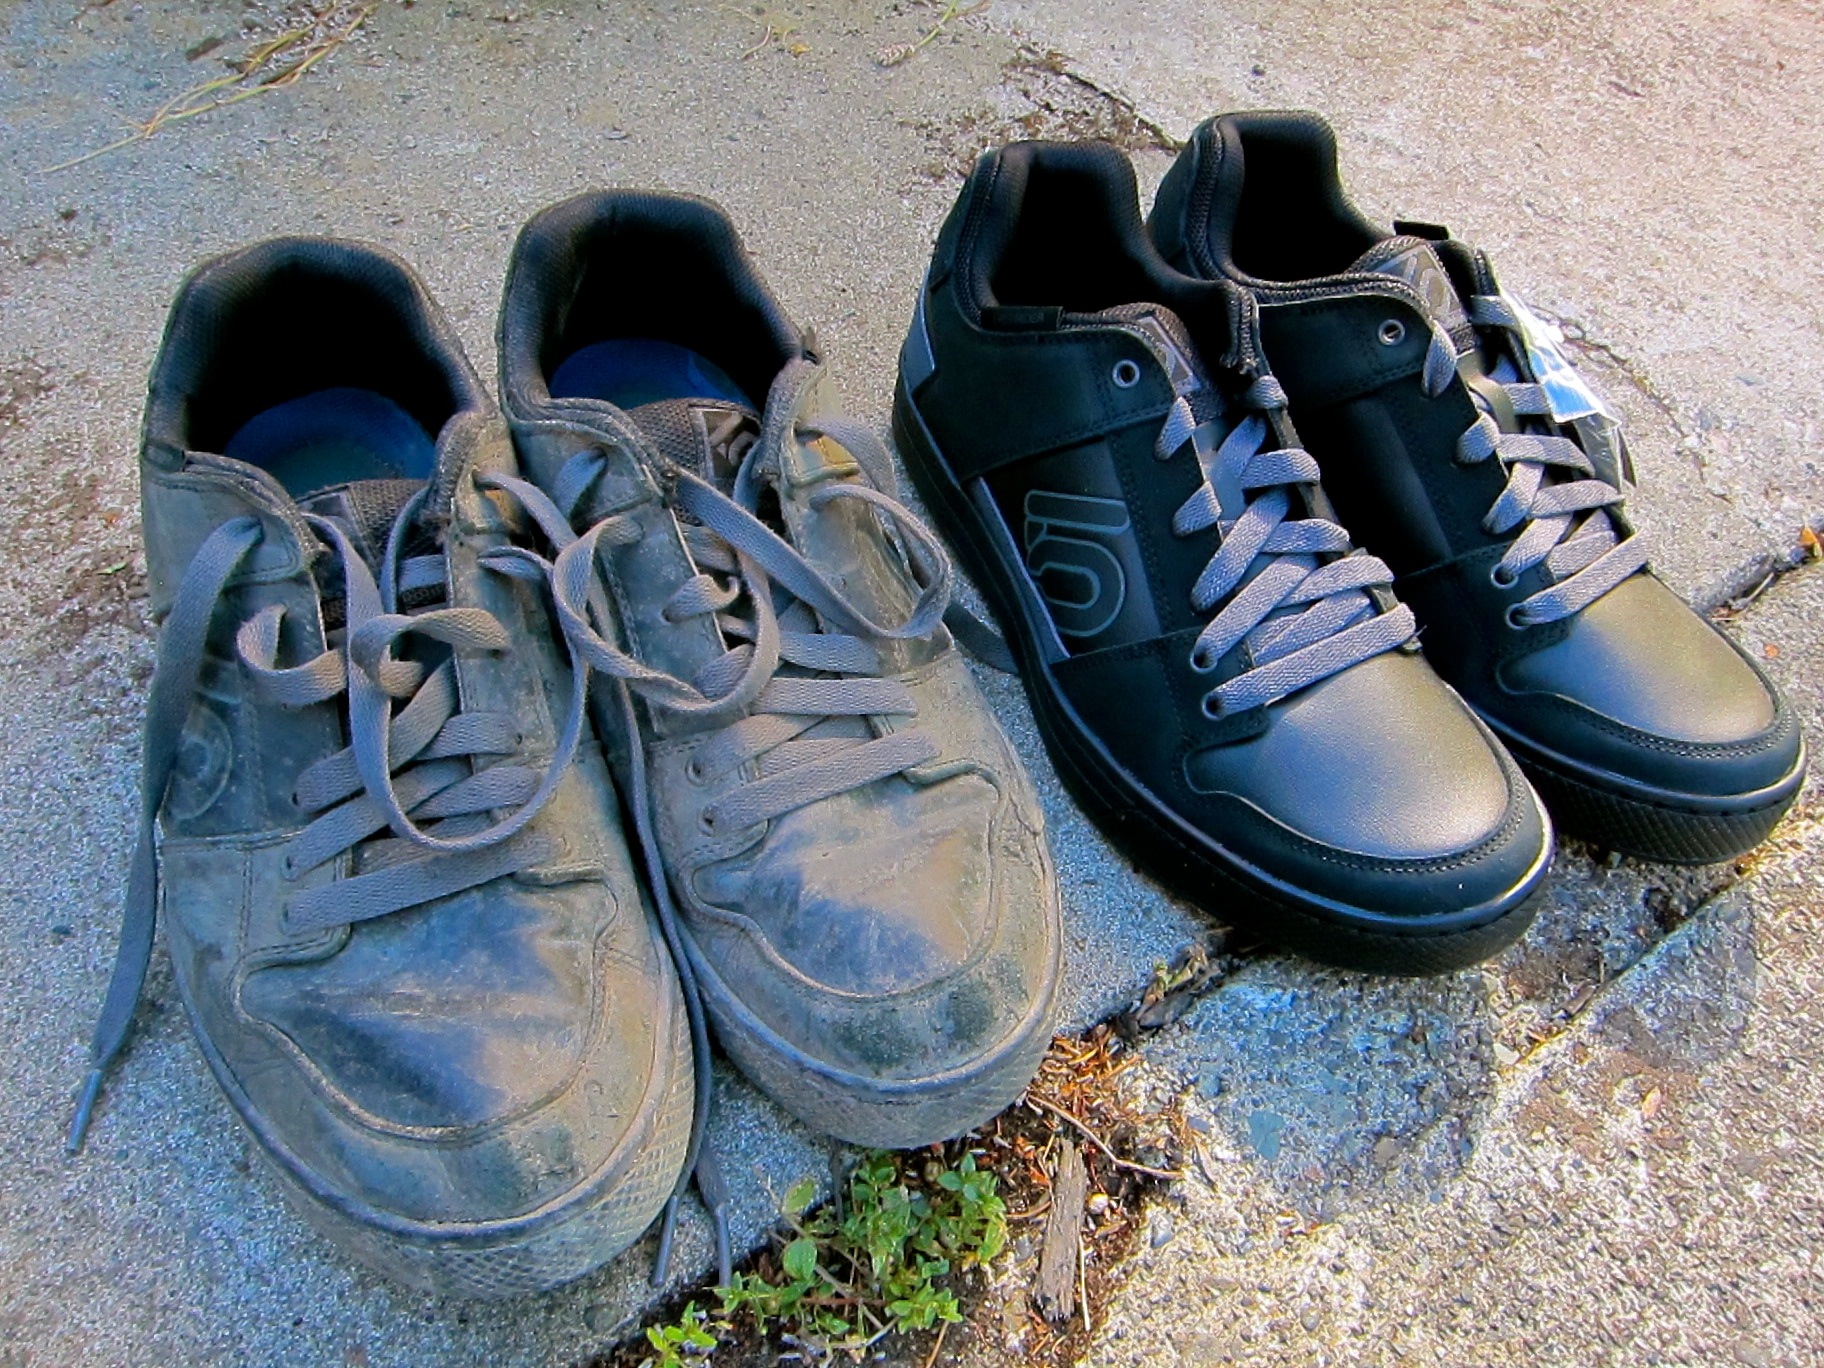
Freshening up the MTB shoes!
This is an 18 month review of my Five Ten Freerider Elements mountain bike shoes. Read my 6 month review here to get my initial thoughts as I won’t repeat them in this post.
Since getting these shoes I haven’t worn my previous 5.10 Impact Low shoes one time. Having said that on my last bikepacking trip my feet were getting sore and I felt like I just wasn’t getting the support I was used to from the Elements. I had bought a replacement pair on sale so I pulled them out and they were noticeably stiffer and more comfortable. So I put them into service and put the older pair in the closest as back up.
My Impact Lows withstood years of hard use and are still as good as they were on Day 1. So the Elements are definitely not as robust. I guess that’s reasonable from a much lighter more compact shoe. I ride year round and I bikepacked in these shoes so 18 months of use isn’t nothing. My old Elements are still in fine shape for light duty use. They are soft and very comfortable for wearing socially or cruising around town. Although they look a little rough! Where they start to let me down is 4-5hrs into a ride.
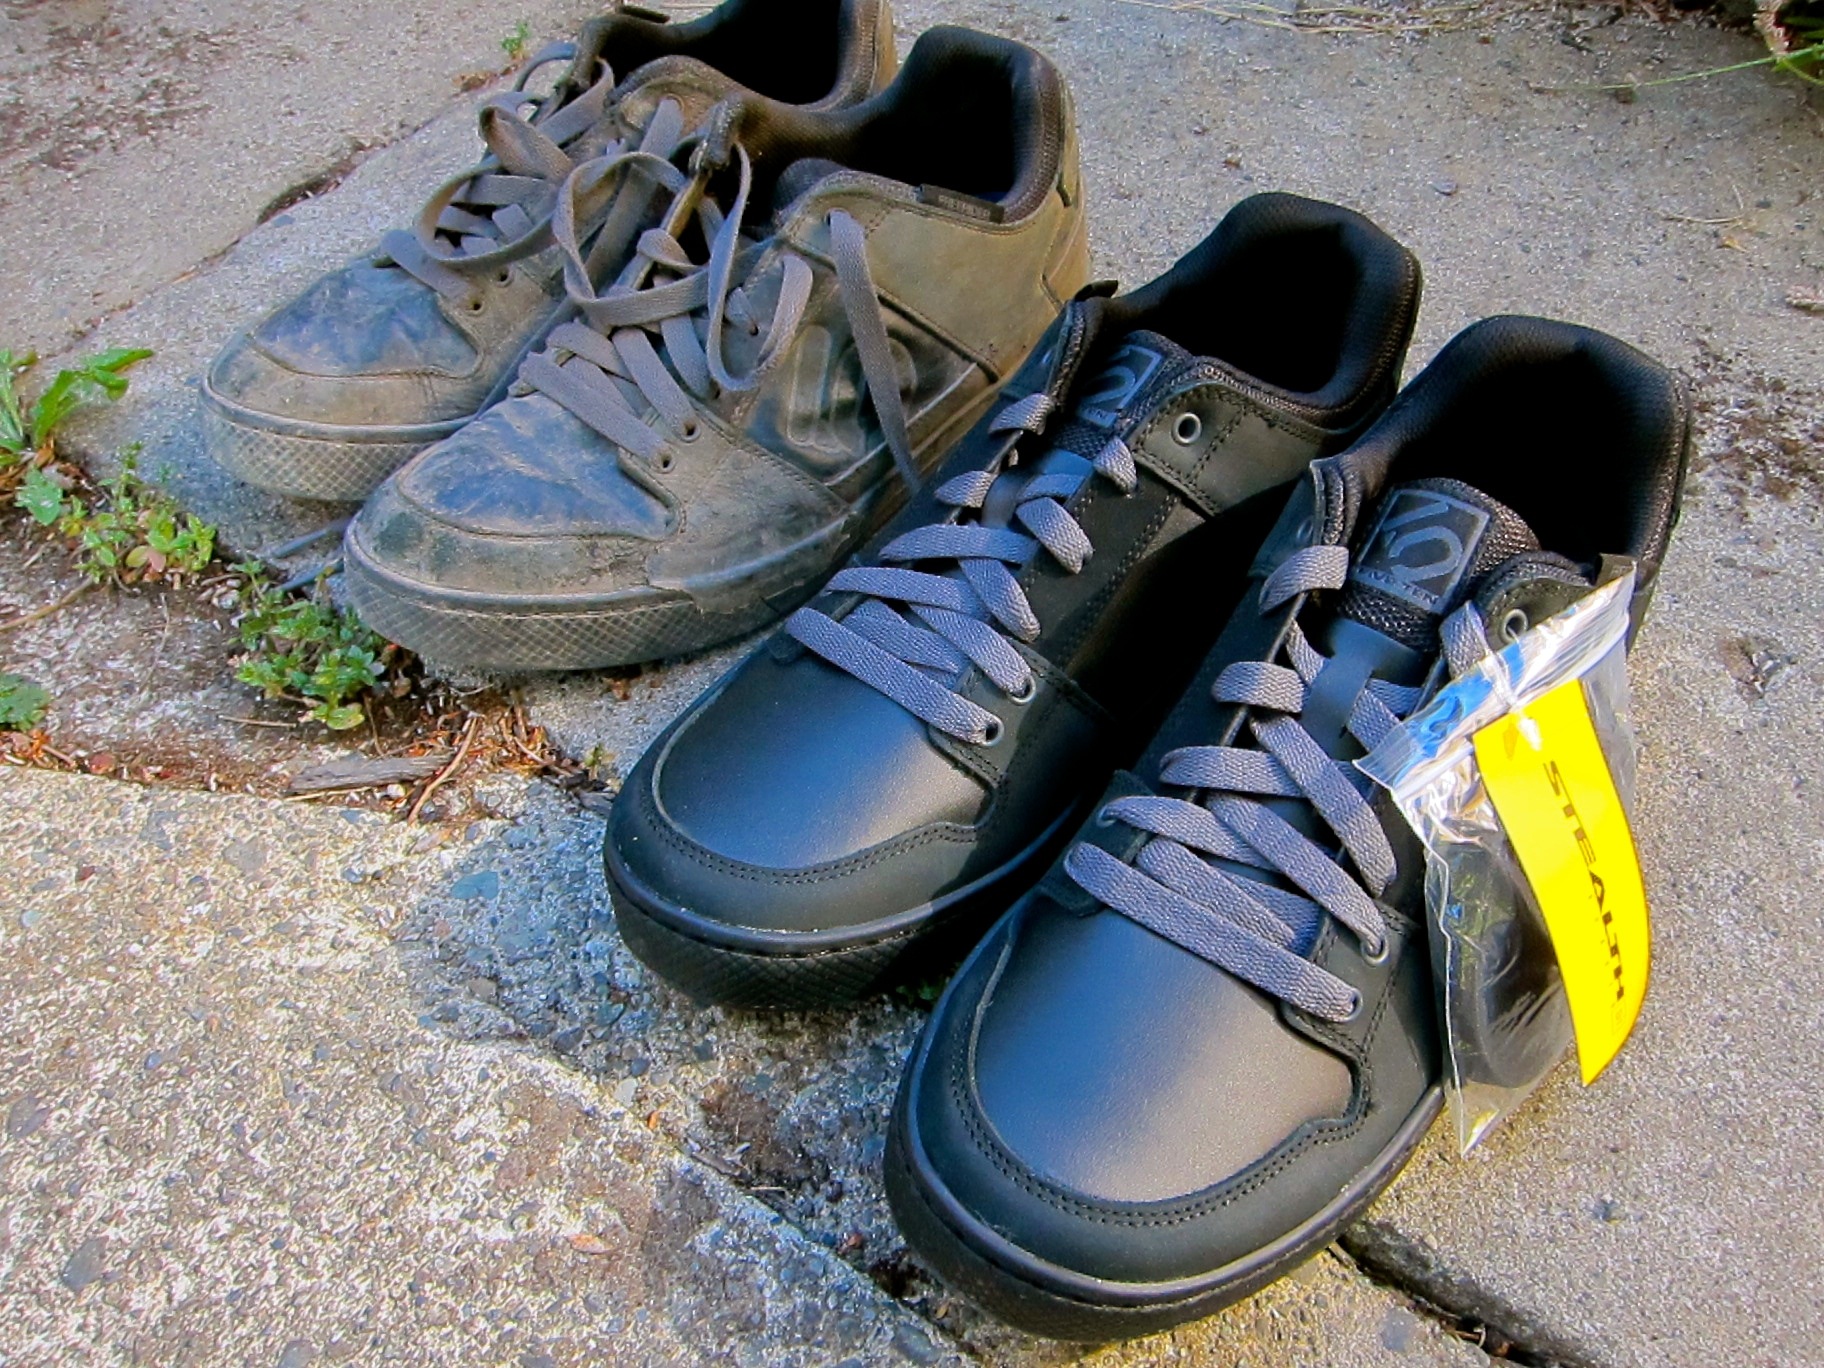
So shiny…
A couple other downsides to the Elements are:
I tagged a rock at speed recently wearing the Elements and thought I had broken my toe. The Impact Lows would have shrugged that hit off with far less damage to my foot.
I’m really enjoying the stiffer feel of the new pair of Elements and I expect to get another 18 months of use from them before I need to think about new shoes. The trade off in service life and protection is reasonable in exchange for a lighter more versatile shoe.
If you are wondering the Elements are just a more weatherproof version of the straight up Freeriders. They do repel moisture well, but a low shoe can only keep you so dry in the wet. They dry faster than the Impact Lows and they are not particularly hot in the summer so I wear the Elements year round. I wouldn’t hesitate to buy the normal Freeriders if I got a good deal on a pair. I don’t think the weatherproofness of the Elements is a big deal.
I’m not sure I’ll buy a 3rd pair. I might, but 3yrs is also enough time to spend wearing one shoe that I will probably be ready to see what’s new or go back to the Impact Lows for a while and feel all retro.
If you want a lighter mountain bike flats shoe that bikepacks well and can go out to a club dancing without looking too weird the Elements or there Freerider cousins are worth a look.
Bitching BC bikepacking! 😉
